December is just around the corner, and it’s the perfect season to get out the glue, scissors, and popsicle sticks! Whether it’s for a day off, a classroom activity, or a quiet evening at home, a Christmas craft lets kids get creative while getting the house ready for the holidays.
Here are 10 simple ideas, with the supplies you’ll need and the main steps for each. Most of them can be made with things you already have at home.
Before You Start
- Protect the table with newspaper or a tablecloth.
- Set up the supplies ahead of time in bins or plates, so kids can find what they need.
- Keep the hot glue gun for adults. White glue or a glue stick works just fine for little ones.
- Remember to label the masterpieces. A small name on the back, and the craft won’t get lost between school and home!
1. Gingerbread House Garland
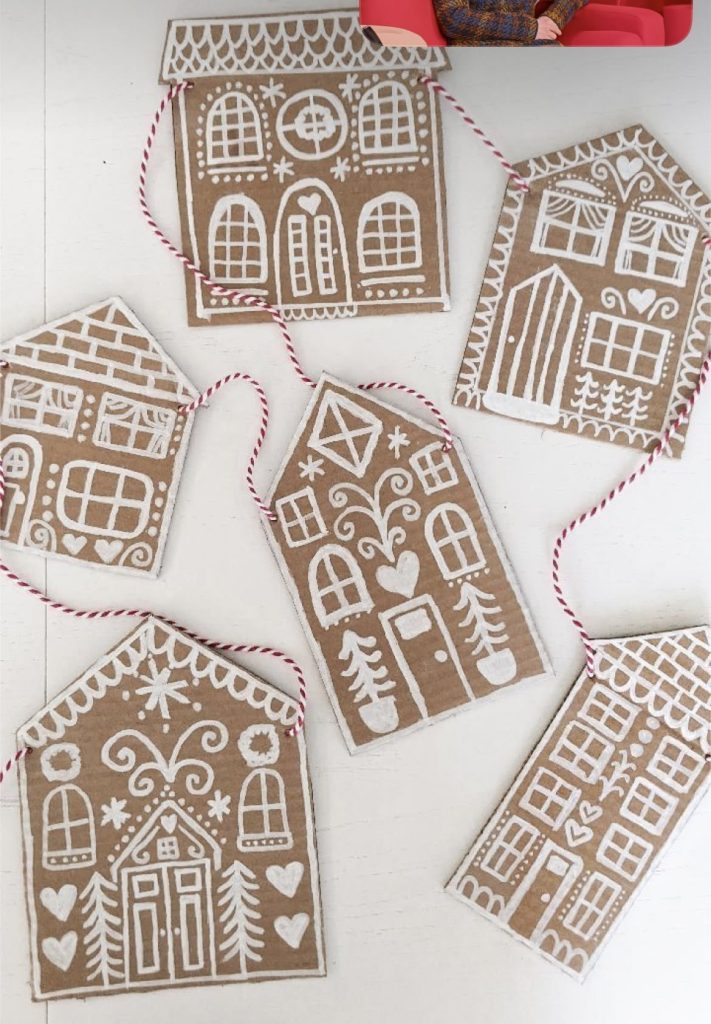
A garland that looks like a gingerbread village, without a crumb of flour. Brown cardboard looks just like real baked dough, and the icing is made with a white pencil or white paint.
Supplies: brown cardboard (a recycled box works great), white pencil or white paint, scissors, hole punch, red or white string.
Steps:
- Cut out house shapes of different sizes from the cardboard.
- Draw the houses with a white marker or white paint, like icing.
- Punch a hole on each side at the top of every house.
- Thread the string through the holes to connect the houses, then hang the garland.
2. Popsicle Stick Christmas Trees
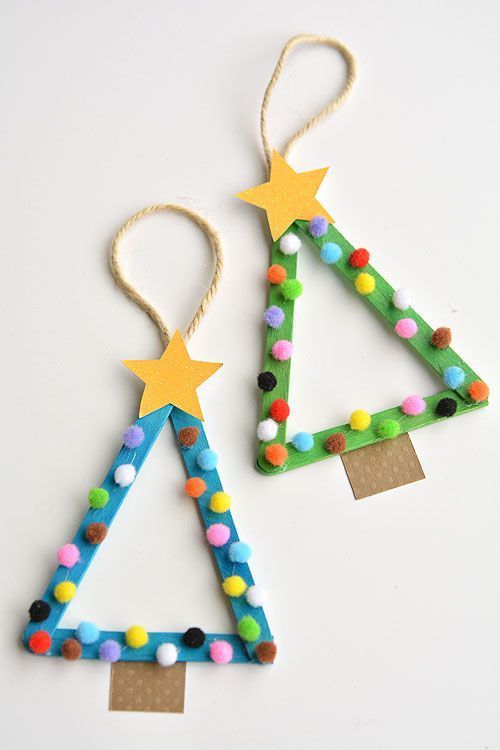
A small, colorful ornament to hang on the tree, or to give as a gift to grandma.
Supplies: 3 popsicle sticks per tree, paint, colored pom-poms, yellow or gold paper star, small square of brown cardboard, string, glue.
Steps:
- Glue three sticks together in a triangle shape and let dry.
- Paint the triangle in the color of your choice.
- Glue pom-poms all over, like Christmas ornaments.
- Add the brown cardboard square at the bottom for the trunk and the star at the top.
- Glue a loop of string on the back for hanging.
3. Handprint Reindeer
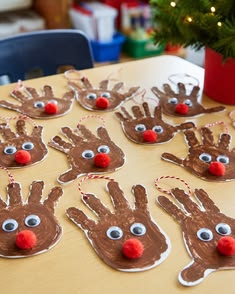
A classic that melts parents’ hearts: your child’s hand becomes the reindeer’s antlers. It’s a lovely keepsake to hold on to year after year.
Supplies: brown cardboard or paper, pencil, scissors, googly eyes, red pom-pom, string or cord, glue.
Steps:
- Trace your child’s hand on the cardboard, fingers spread apart, then cut it out.
- Glue on the eyes and the red pom-pom for the nose.
- Add a loop of string for hanging.
A little tip: write your child’s name and the year on the back.
4. Popsicle Stick Snowflakes
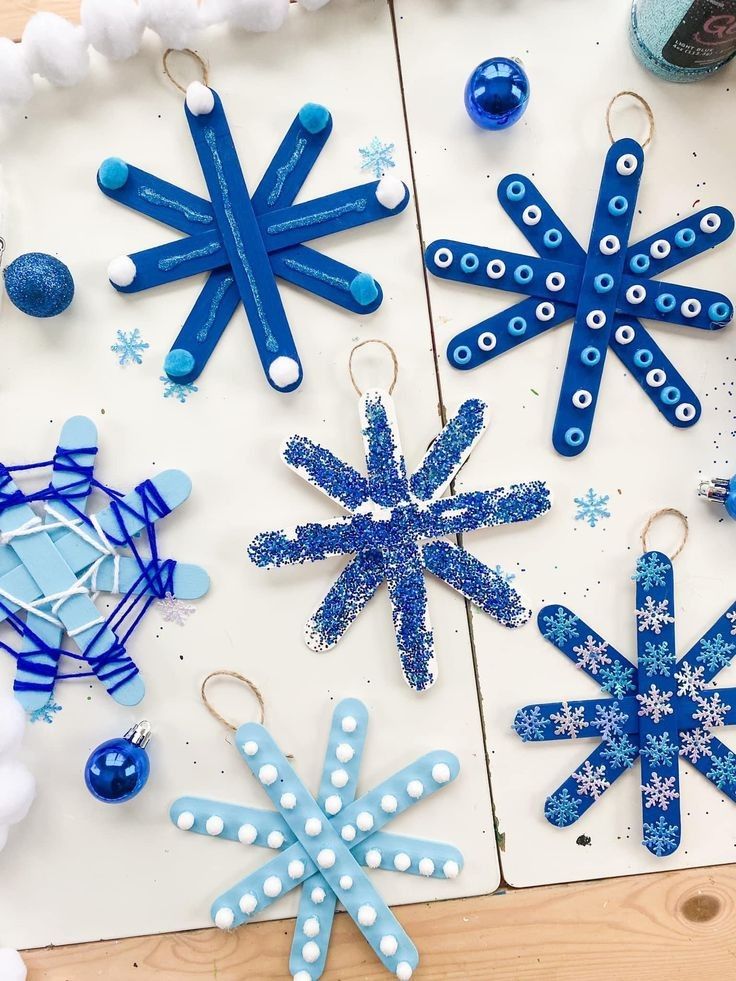
Every snowflake is unique, and that’s perfect: kids can decorate them however they like with pom-poms, beads, glitter, or yarn.
Supplies: 4 popsicle sticks per snowflake, blue or white paint, glue, pom-poms, beads, glitter, yarn, string.
Steps:
- Cross the sticks in a star shape and glue them together at the center. Let dry.
- Paint the snowflake.
- Decorate it: pom-poms at the tips of the arms, a line of beads, glitter, or wrapped yarn.
- Add a loop of string to hang it on the tree.
5. Paper Snow Globe
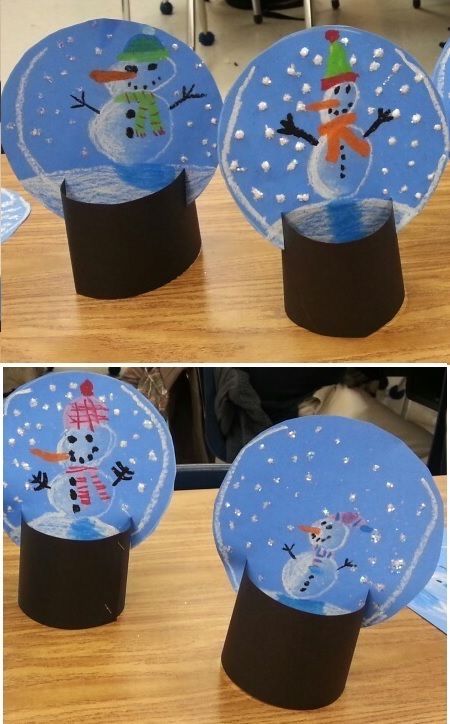
A snow globe with no water or glycerin, perfect for a classroom drawing activity.
Supplies: blue cardstock, white wax crayons or pastels, colored pencils, black cardboard, glue, scissors.
Steps:
- Cut out a large circle from the blue paper.
- Draw inside the circle with the wax crayons or pastels.
- Roll the black cardboard into a cylinder to make the base and glue it.
- Cut a small slit in the base, and slide the circle in so it stands up.
6. Ice Skaters on a Paper Plate
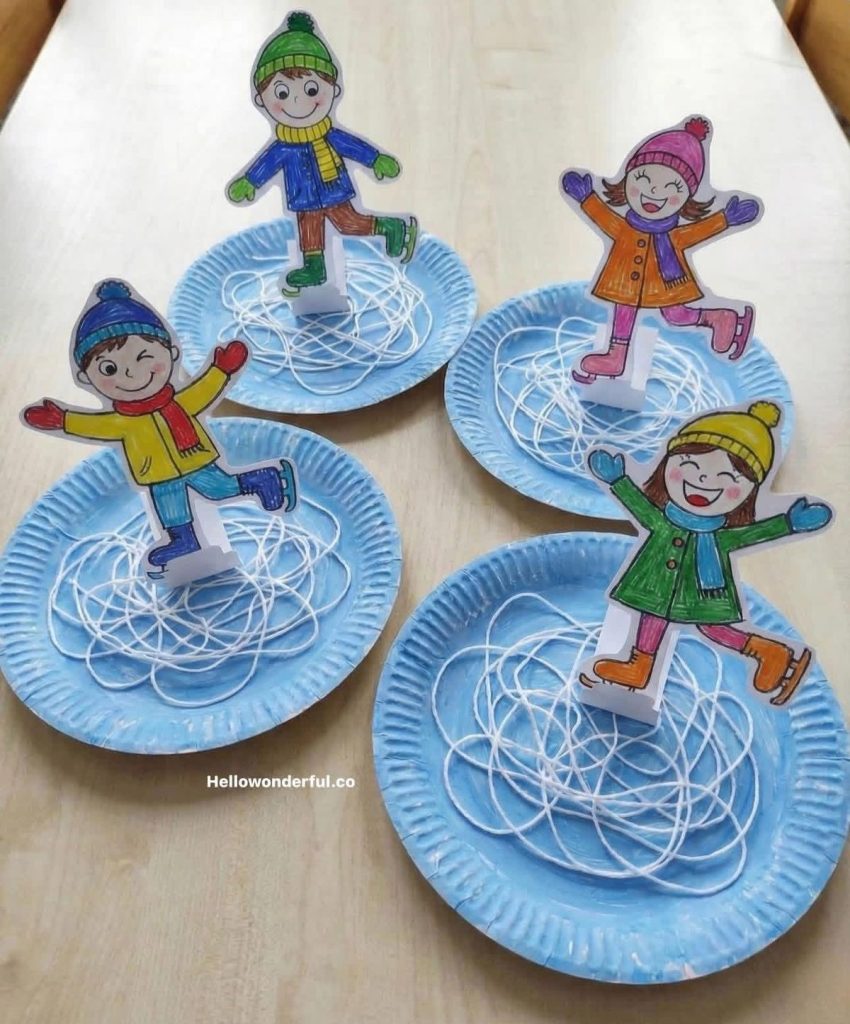
The plate becomes a skating rink, and the skater is drawn and colored by your child. A lovely way to celebrate winter without leaving the house.
Supplies: paper plate, blue paint, white yarn or string, glue, white sheet of paper, colored pencils, scissors.
Steps:
- Paint the plate light blue and let dry.
- Glue the yarn in loops and zigzags to imitate skate tracks on the ice.
- Draw a skater on the sheet, color it, and cut it out. Leave a small folded tab under the skates.
- Glue the tab onto the plate so the skater stands up.
7. Cotton Ball Igloo
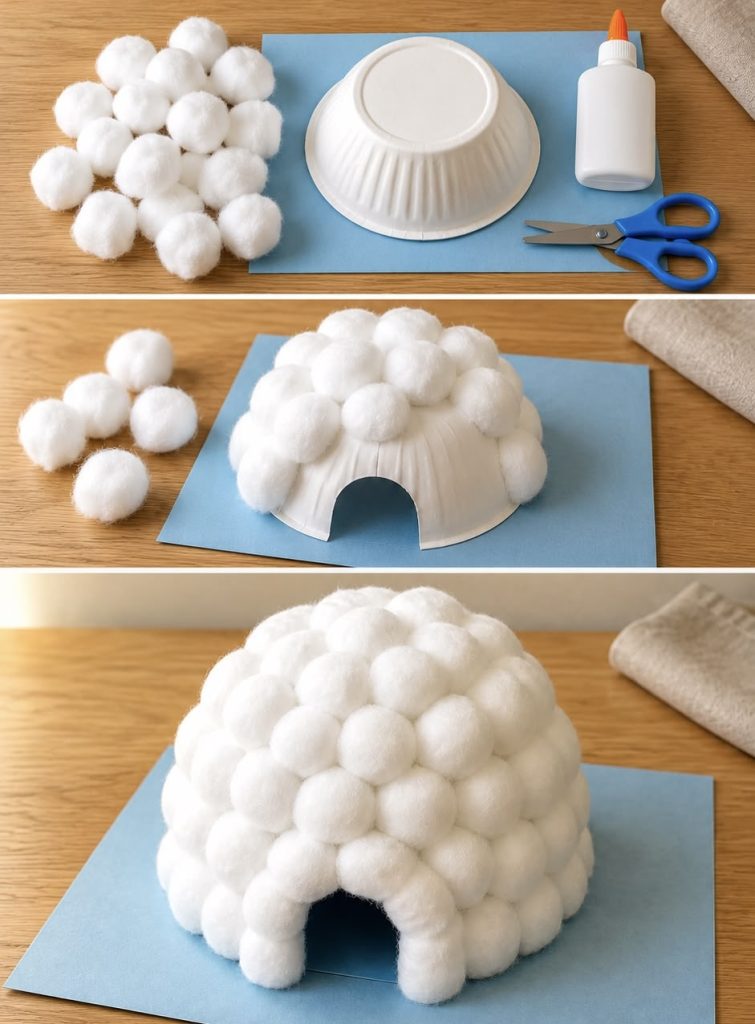
A soft and gentle craft, perfect for little ones.
Supplies: paper bowl, cotton balls, glue, blue sheet of paper, scissors.
Steps:
- Turn the bowl upside down on the blue sheet.
- Cut out a small arch for the door and glue the bowl onto the paper.
- Glue the cotton balls on one by one.
- Let dry before moving it.
8. Christmas Characters Made From a Toilet Paper Roll
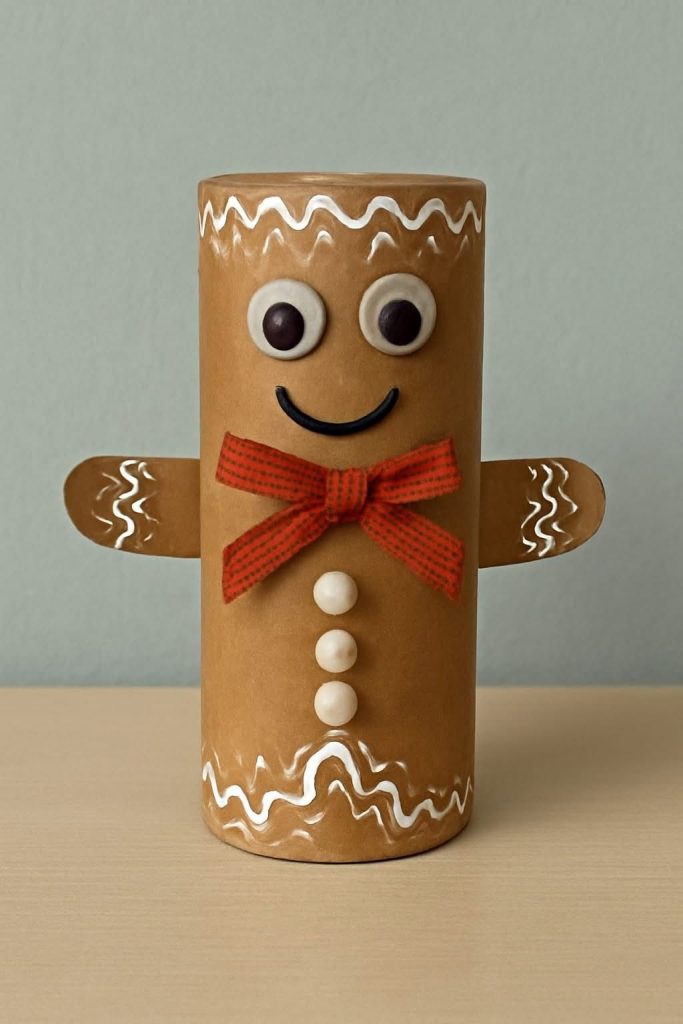
Once you have the basic idea, a toilet paper roll can turn into a whole bunch of characters.
Supplies: toilet paper roll, colored cardboard, colored pencil or paint, googly eyes, ribbon, small buttons or white pom-poms, glue.
- A gingerbread man: cover the roll with brown paper, glue two brown cardboard arms on each side, and add googly eyes. Finish with a red ribbon bow tie, three small white buttons down the middle, and white wavy “icing” drawn with a pencil or paint.
- An elf: cover the roll with green or red paper, add a pointed cone hat, two small pointy ears, a big smile, and a belt with a gold buckle.
- A snowman: cover the roll with white paper, add an orange carrot nose, black eyes and buttons, a fabric or yarn scarf, and a small hat.
- A reindeer: cover the roll with brown paper, add brown cardboard antlers, googly eyes, a red pom-pom for the nose, and a bow.
- Santa Claus: red paper, black belt, cotton ball beard, and a pointed hat.
9. Paper Winter Landscape
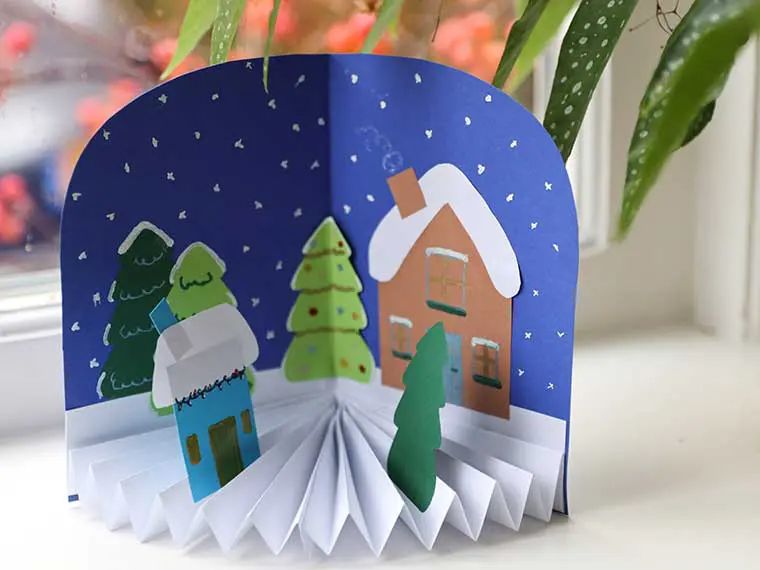
A three-dimensional scene that looks like a little theater stage. The secret: the snow is made from accordion-folded paper.
Supplies: colored cardstock, white paper, scissors, glue.
Steps:
- Cut a half circle from colored paper to make the sky.
- Fold a sheet of white paper into an accordion, then fix one side to form a fan. This will be the snowy hill.
- Glue the fan at the bottom of the sky.
- Cut out trees, little cabins, and anything else you can think of.
- Glue everything together to create the scene.
10. Christmas Card With a Paper Tree
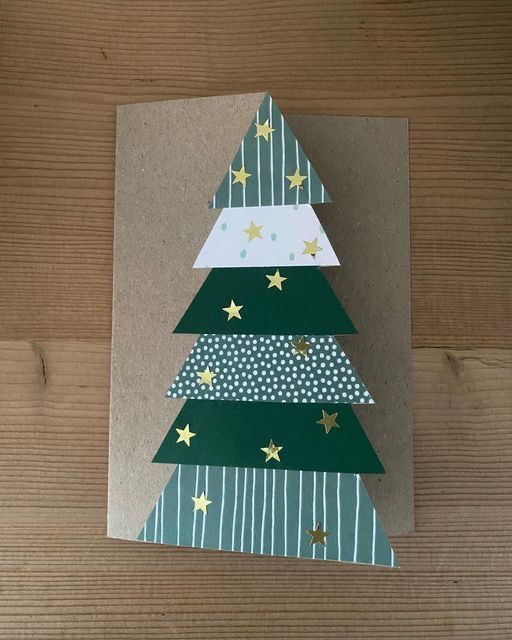
A handmade gift for parents, grandparents, teachers, or friends.
Supplies: cardboard folded in half, green and white patterned papers, colored pencils, scissors, glue.
Steps:
- Cut out six trapezoids of paper, from the smallest at the top to the largest at the bottom.
- Glue them one under the other on the card to form the tree.
- Decorate the tree with pencils.
- Write a little message inside.
If you prefer a coloring version, check out our printable Christmas cards to color.
To Keep the Holiday Spirit Going
A Christmas craft doesn’t have to be perfect to be a success. What matters is the time spent together, the laughter, and your child’s pride in their creation. So get out the scissors, put on some Christmas music, and let the magic happen!
And to keep the holiday spirit going:
- Looking for elf on the shelf ideas? We have the 17 best easy elf on the shelf for you!